1. Gate valve maintenance
1.1 The main technical parameters:
DN: NPS1”~ NPS28”
PN: CL150~CL2500
Material of main parts: ASTM A216 WCB
Stem—ASTM A276 410; Seat—ASTM A276 410;
Sealing face—VTION
1.2 Applicable Codes and Standards: API 6A、API 6D
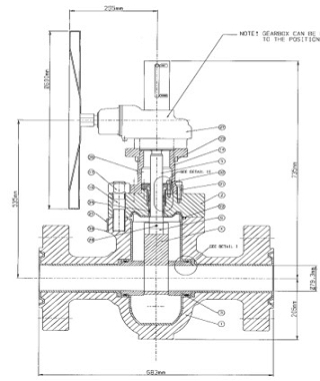
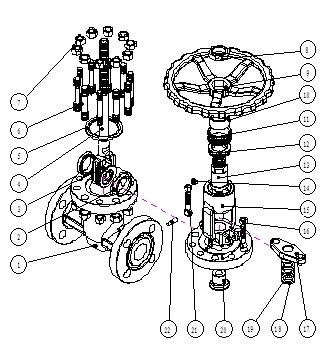
1.3 The structural of valve (see Fig.1)

Fig.1 Gate valve
2. Inspection and maintenance
2.1:Inspection of the outer surface:
Inspect the outer surface of valve to check if any damage, and then numbered; Make a record.
2.2 Inspect the shell and sealing:
Check if any leak situation and make an inspection record.
3. Disassemble of the Valve
Valve must be closed before disassemble and loosen the connecting bolts. Shall to select the appropriate non-adjustable spanner to looser bolts,Nuts shall be damaged easily by adjustable spanner.
Rusty bolts and nuts must be soaked with kerosene or liquid rust remover; Check screw thread direction and then twist slowly. Disassembled parts must be numbered, marked and kept in order. Stem and gate disc must be put on bracket to avoid Scratch.

3.1 Cleaning
Make sure spare parts are cleaned softly by brush with Kerosene, gasoline, or cleaning agents.
After cleaning, make sure spare parts are no-grease & rust.
3.2 Inspection of spare parts.
Inspect all the spare parts and make a record.
Make a suitable maintenance plan according to the inspection result.
4. Repair of spare parts
Repair the spare parts according to inspection result and maintenance plan; replace the spare parts with same materials if required.
4.1 Repair of gate:
①Repair of T-slot:Welding can be used in T-slot fracture repair, Correct T-slot distortion, Weld both sides with reinforcing bar. Surfacing welding can be used to repair T-slot bottom. By using heat treatment after welding in order to eliminate stress and then use PT penetration to inspect.
②Repair of dropped:
Dropped mean the gap or serious dislocation between gate sealing face and Seat sealing face. If parallel gate valve dropped, can weld top and bottom wedge, then, process grinding.
4.2 Repair of sealing face
The main cause of valve internal leakage is sealing face damage. If damage is serious, need to weld, machining and grind sealing face. If not serious, only grinding. Grinding is the main method.
a. The basic principle of grinding:
Join the surface of grinding tool together with workpiece. Inject abrasive into gap between the surfaces, and then move the grinding tool to grind.
b. Grinding of gate sealing face:
Grinding mode: manual mode operation
Smear abrasive on the plate evenly, put the workpiece on the plate, and then rotate while grind in straight or “8”line.
4.3 Repair of stem
a. If any scratch on stem sealing face or rough surface cannot match design standard, sealing face shall be repaired. Repair methods: flat grinding, Circular grinding、Gauze grinding、machine grinding and Cone grinding;
b. If valve stem bent >3%,process Straightening treatment by center less grinding machine to make sure surface finish and process crack detection. Straightening methods: Static pressure straightening、Cold straightening and Heat straightening.
c. Stem head repair
Stem head mean parts of stem (stem sphere, stem top, top wedge, connecting trough etc) connected with open-and- close parts. Repair methods: cutting, welding, insert ring, insert plug etc.
d. If cannot meet the inspection requirement, must re-produce with same material.
4.4 If any damage with the surface of flange on both sides of body,must process machining to match the standard requirement.
4.5 Both sides of body RJ connection, if cannot match standard requirement after repair, must be welded.
4.6 Replacement of wearing parts
Wearing parts include gasket, packing, O-ring etc. Prepare wearing parts according to maintenance requirements and make a record.
5. Assemble and installation
5.1 Preparations: Prepare repaired spare parts, gasket, packing, installation tools. Put all the parts in order; do not lay on the ground.
5.2 Cleaning check: Clean spare parts (fastener, sealing, stem, nut, body, bonnet, yoke etc) with Kerosene, gasoline or cleaning agent. Make sure no-grease & rust.
5.3 Installation:
At first, check the indentation of stem and gate sealing face confirm the connecting situation;
Purge, wipe the body, bonnet, gate, sealing face to keep clean, Install spare parts in order and tighten the bolts symmetrically.
Post time: May-19-2022

